
A shaker range hood is more than ventilation, it’s a statement piece that ties together function and timeless design. With its clean lines, recessed panels, and honest joinery, the shaker style has been a mainstay in American homes since the 18th century. Today, it fits as naturally in a modern farmhouse as it does in a transitional kitchen. Whether someone is gutting a kitchen or swapping out a dated vent hood, a shaker range hood offers a way to upgrade ventilation without disrupting the visual flow of cabinetry. This guide walks through what makes a shaker hood distinct, how to choose the right type, and how to install one without calling in a contractor.
Table of Contents
ToggleKey Takeaways
- A shaker range hood combines timeless design with functional ventilation by integrating a blower insert into a custom wood surround that matches kitchen cabinetry.
- Shaker range hoods require proper CFM ratings—250–400 CFM for electric cooktops and 400–600 CFM for gas—to ensure effective smoke, steam, and grease removal.
- Wall-mounted and island-style shaker range hoods offer flexibility, with island models requiring higher CFM ratings and more structural support from ceiling joists.
- Installing a shaker range hood involves rough-in work for ductwork and electrical wiring, followed by mounting the shell and finishing—most projects require building permits and inspections.
- Matching the hood finish to existing cabinets, maintaining proper proportions (3–6 inches wider than the cooktop), and integrating crown molding or corbels ensures visual continuity.
- Shaker hoods require regular maintenance with grease-safe degreasers and occasional touch-ups on painted surfaces, but their neutral style appeals to a wide range of homebuyers.
What Is a Shaker Range Hood?
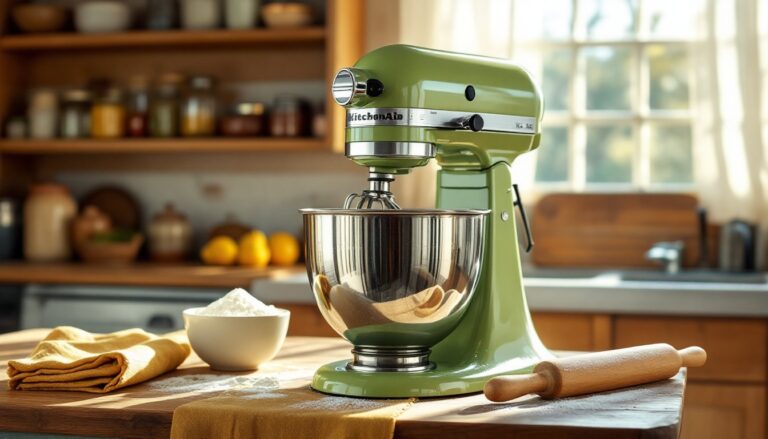
A shaker range hood is a ventilation hood designed with shaker-style cabinetry principles: flat-panel or recessed-panel doors, simple rail-and-stile construction, and minimal ornamentation. Unlike stainless steel or glass hoods that stand out as appliances, shaker hoods are typically built from wood or wood composites and finished to match surrounding cabinets.
The ventilation insert, the actual fan and ductwork, sits inside a custom or semi-custom wood surround. This surround can be built on-site by a finish carpenter or purchased as a kit from a cabinet maker. The insert handles smoke, steam, and grease, while the shaker shell integrates it into the kitchen’s millwork.
Most shaker hoods are made from poplar, maple, or MDF and finished with paint or stain. Poplar takes paint well and is cost-effective. Maple offers a tighter grain for staining. MDF is stable and affordable but requires priming before painting. The joinery typically uses mortise-and-tenon or dowel construction, both of which hold up well in kitchens if finished properly.
Shaker hoods are not just decorative. They’re rated by CFM (cubic feet per minute), the measure of how much air the blower moves. A standard residential range requires 250–400 CFM for electric cooktops and 400–600 CFM for gas. High-BTU ranges or professional-style cooktops may need 900+ CFM and makeup air systems, which require a mechanical permit in most jurisdictions.
Why Choose a Shaker Style Range Hood for Your Kitchen?
Shaker hoods offer a few advantages that stainless or decorative hoods don’t.
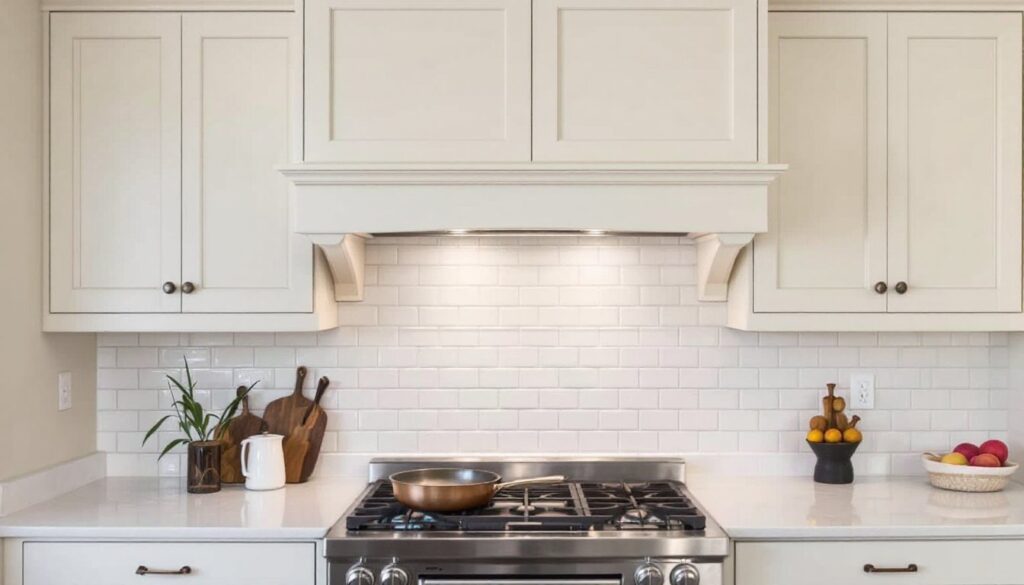
First, they create visual continuity. When cabinetry wraps a range, the hood becomes part of the millwork rather than a foreign object hanging from the ceiling. This is especially useful in open-plan kitchens where the range wall is visible from the living area.
Second, they’re customizable. A homeowner can specify height, width, depth, and finish to match existing cabinets. That’s harder to do with off-the-shelf metal hoods, which come in fixed sizes and finishes. Custom shaker hoods can also incorporate trim, corbels, or crown molding to tie into the rest of the kitchen’s architecture.
Third, they hide the mechanical components. The blower, grease filter, and ductwork sit behind painted or stained wood, not exposed stainless. This appeals to people who want the kitchen to feel like furniture, not an appliance showroom.
From a resale perspective, shaker hoods are neutral enough to appeal to a wide range of buyers. They don’t date the kitchen the way some trend-driven materials do. According to kitchen design research, neutral cabinetry and cohesive millwork are consistently cited as high-value features in buyer surveys.
One tradeoff: shaker hoods require more upkeep than stainless. Wood surfaces near a cooktop collect grease and need regular cleaning with a degreaser safe for the finish. Painted surfaces may need touch-ups after a few years, especially near the cook surface.
Types of Shaker Range Hoods: Finding the Perfect Fit
Shaker hoods come in two primary mounting configurations, each suited to different kitchen layouts.
Wall-Mounted Shaker Range Hoods
Wall-mounted hoods are anchored to the wall above the range, typically between two runs of upper cabinets. They’re the most common type and the easiest to install in a standard kitchen.
The hood shell is usually built as a boxed surround with a front face, two sides, and a bottom panel that conceals the blower insert. The top is open or has a small chase that connects to ductwork running up the wall and out through the roof or exterior wall.
Installation requires locating wall studs and securing the unit with lag bolts or heavy-duty screws. Most inserts weigh 40–80 pounds, and the wood surround adds another 30–50 pounds, so blocking between studs or a cleat across multiple studs is often necessary.
Wall-mounted shaker hoods work best when there’s at least 18 inches of clearance between the cooktop and the bottom of the hood for electric ranges, and 24–30 inches for gas to meet fire safety codes. The exact height depends on the hood’s CFM rating and the manufacturer’s specs.
Island Shaker Range Hoods
Island hoods hang from the ceiling above a cooktop in an island or peninsula. They require more robust structural support because there’s no wall backing, just ceiling joists.
The hood is typically built as a four-sided box with all faces finished, since it’s visible from every angle. Ductwork runs up through the hood into the ceiling, then laterally to an exterior wall or roof vent. This routing can be tricky in homes with engineered trusses or HVAC runs in the ceiling cavity.
Island hoods need to be anchored to ceiling joists with threaded rod or heavy-duty mounting brackets. If joists run perpendicular to the desired mounting location, blocking between joists is required. This is straightforward in new construction but may require cutting into drywall in a remodel.
Island hoods also need higher CFM ratings than wall-mounted hoods because there’s no wall to contain air currents. A good rule of thumb is to add 50–100 CFM over what a wall-mounted unit would require for the same cooktop.
Both types are available as semi-custom kits from cabinet makers or can be built on-site by a finish carpenter. Kits generally include the shaker shell, mounting hardware, and instructions but not the blower insert, which is purchased separately from a range hood manufacturer.
How to Install a Shaker Range Hood (DIY Guide)
Installing a shaker range hood is a two-stage process: rough-in the ductwork and electrical, then mount and finish the hood shell.
Tools needed:
- Stud finder
- Drill/driver with bits
- Level (24-inch or laser)
- Jigsaw or reciprocating saw (for duct routing)
- Wire strippers and electrical tester
- Safety glasses and dust mask
Materials:
- Shaker hood shell and insert
- 6-inch or 8-inch rigid duct pipe (or flex duct where allowed by code)
- Duct tape (foil-backed)
- Lag bolts or 3-inch wood screws
- Wire nuts and 14/2 or 12/2 Romex (depending on circuit)
- Wall cap or roof jack
Step 1: Plan the ductwork. The most efficient vent route is straight up through the roof or out the nearest exterior wall. Horizontal runs reduce CFM by about 25% per 90-degree elbow, so minimize bends. Check local code, some jurisdictions require rigid metal duct for the entire run: others allow short flex sections.
Step 2: Rough in electrical. Most range hoods require a dedicated 15-amp circuit. Run Romex from the breaker panel to a junction box located inside the hood shell or above the ceiling. If the home doesn’t have an available circuit, hire a licensed electrician. This is not the place to overload an existing kitchen circuit.
Step 3: Cut the duct opening. If venting through the wall, mark the centerline of the range, measure up to the hood height, and cut a hole sized for the duct pipe. Use a reciprocating saw and check for studs, plumbing, or wiring before cutting. For roof vents, the opening is cut from the attic side after verifying rafter locations.
Step 4: Install blocking or cleat. Locate studs with a stud finder. For wall-mounted hoods, screw a 2×4 cleat horizontally across at least two studs at the height specified by the hood manufacturer. For island hoods, install blocking between ceiling joists or use threaded rod anchored to joists.
Step 5: Hang the insert. Most inserts have a mounting bracket that screws into the cleat or blocking. Lift the insert into place (this often takes two people), level it, and secure it with the provided screws or bolts. Connect the ductwork to the insert’s outlet with foil duct tape, don’t use cloth duct tape, which degrades from heat and grease.
Step 6: Wire the insert. Turn off power at the breaker. Connect the Romex to the insert’s junction box following the manufacturer’s wiring diagram, typically black to black (hot), white to white (neutral), and ground to ground. Cap connections with wire nuts and secure the cable with a strain relief connector. Restore power and test the blower and light.
Step 7: Attach the shaker shell. The wood surround typically mounts over the insert with screws driven through the shell’s interior into the insert’s housing or into the wall cleat. Some designs use French cleats for easier removal. Make sure the shell is level and flush with adjacent cabinets.
Step 8: Finish and seal. Caulk any gaps between the hood shell and the wall or ceiling with paintable caulk. Touch up screw holes with wood filler if needed. If the hood was primed but not finished, apply the final paint or stain to match cabinets.
Permitting note: Ductwork and electrical for range hoods typically require permits and inspections in most jurisdictions. According to residential renovation standards, any work involving new circuits or exterior penetrations for venting should be inspected. Check with the local building department before starting.
Styling Tips: Matching Your Shaker Range Hood with Kitchen Decor
A shaker hood should feel like part of the cabinetry, not an afterthought.
Finish consistency is the most important factor. If cabinets are painted, paint the hood in the same color and sheen. If cabinets are stained, match the wood species and finish as closely as possible. Even slight mismatches in sheen, satin vs. semi-gloss, will be visible under kitchen lighting.
Proportions matter. The hood should be at least as wide as the cooktop, and typically 3–6 inches wider on each side to capture steam effectively. A hood that’s too narrow looks pinched and doesn’t vent well. One that’s too wide overwhelms the range wall. For a 36-inch range, a 42- or 48-inch hood is standard.
Crown molding and trim can tie the hood into surrounding cabinets. If uppers have crown, carry it across the hood. If cabinets have a flat profile, keep the hood simple. Adding too much detail to the hood when cabinets are minimal creates visual noise.
Corbels or brackets are a common detail on shaker hoods, especially in traditional or farmhouse kitchens. They should be functional or at least appear structural, thin, spindly brackets look tacked on. Solid wood corbels in a profile that echoes cabinet door frames work best.
Hardware can be repeated from cabinets, but it’s not required. Some designers add bin pulls or knobs to lower access panels on the hood for symmetry. Others leave it clean.
Lighting is functional but also an opportunity for style. Many inserts include built-in LED task lights. For a more custom look, puck lights or linear LED strips can be added inside the hood shell to highlight the range.
Backsplash integration is often overlooked. If the backsplash continues up the wall behind the hood, make sure the hood shell sits flush or slightly proud of the tile. If the hood sits recessed, grout lines won’t align and the installation will look amateur. For clean results, tile around the hood after it’s mounted, not before.
According to appliance and decor testing, painted shaker hoods in white, off-white, or gray remain the most popular choices for resale value, but bold colors, navy, forest green, charcoal, are gaining traction in custom builds where the hood becomes a focal point. The key is committing to the choice across all cabinetry, not just the hood.