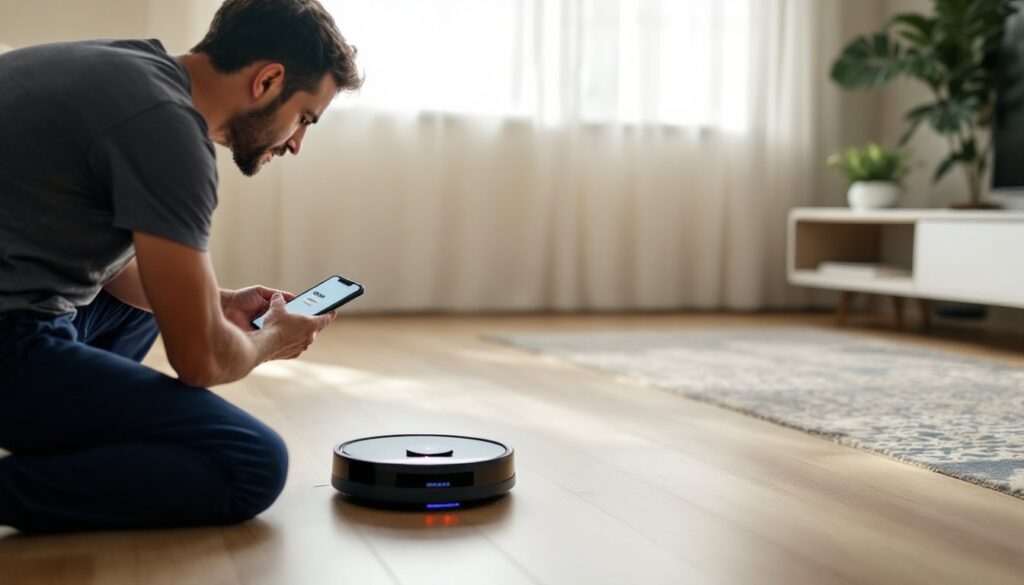

Nothing’s more frustrating than watching a Shark robot vacuum sit idle because it’s lost its Wi-Fi connection. One day it’s mapping the living room perfectly, the next it’s blinking error lights and refusing to respond to app commands. Wi-Fi disconnections are one of the most common issues with robotic vacuums, but they’re usually fixable without a service call. Most connection problems stem from router settings, app glitches, or firmware hiccups, not hardware failure. This guide walks through proven fixes to reconnect a Shark robot vacuum to Wi-Fi, troubleshoot app issues, and prevent future dropouts.
Table of Contents
ToggleKey Takeaways
- Shark robot vacuum disconnection issues are usually caused by Wi-Fi band compatibility, router placement, or firmware mismatches rather than hardware failure.
- Restart both your vacuum and router (waiting 60 seconds between) to resolve about 70% of Shark robot vacuum connection problems without losing saved maps.
- Ensure your Shark vacuum connects to a 2.4 GHz network only—create a separate 2.4 GHz-only SSID if your router broadcasts both 2.4 GHz and 5 GHz bands under the same name.
- A factory reset clears corrupted network credentials and firmware conflicts but erases saved maps and schedules, making it a last resort when quick fixes fail.
- Keep the charging dock within 25 feet of your router, assign a static IP address to the vacuum, disable band steering, and reboot your router monthly to prevent future disconnections.
- Check SharkClean app permissions for location, Bluetooth, and background data access—and force close the app rather than just switching screens to refresh its connection.
Why Your Shark Robot Vacuum Keeps Disconnecting
Most Shark robot vacuum disconnections trace back to Wi-Fi compatibility issues. Shark models require a 2.4 GHz network, they won’t connect to 5 GHz bands. Many modern routers broadcast both frequencies under the same network name (SSID), which confuses older smart devices. The vacuum tries to connect, sees the 5 GHz option first, and fails.
Router placement also matters. If the vacuum’s dock sits more than 30 feet from the router or behind thick walls (concrete, brick, metal studs), signal strength drops below the threshold needed for stable connection. Robotic vacuums don’t have powerful antennas, they’re built for floor cleaning, not long-range Wi-Fi.
Firmware mismatches between the SharkClean app and the vacuum cause silent failures. If the app updates automatically but the vacuum’s firmware doesn’t, they stop communicating properly. Shark pushes firmware updates through the app, but the vacuum must be connected to Wi-Fi to receive them, creating a frustrating loop when it’s already disconnected.
Network congestion on crowded 2.4 GHz channels (especially in apartments or dense neighborhoods) can bump smart home devices offline. Microwaves, baby monitors, and cordless phones all share this frequency and create interference. According to testing by Tom’s Guide, router channel overlap is a leading cause of smart device dropouts in multi-unit buildings.
Quick Fixes to Reconnect Your Shark Robot Vacuum
Start with the simplest solutions before diving into factory resets. These quick fixes resolve about 70% of connection problems without losing saved maps or schedules.
Restart Your Vacuum and Router
Power cycling clears temporary network glitches and forces fresh handshakes between devices. Turn off the Shark vacuum using the power switch (usually on the side near the dustbin). Unplug the charging dock from the wall outlet. Don’t just press the Clean button, that puts it in standby, not full shutdown.
Unplug the router and modem (if separate) from power. Wait 60 seconds. This pause matters, it gives capacitors time to fully discharge and network tables to clear. Plug the modem back in first, wait until all status lights stabilize (usually 30-60 seconds), then plug in the router.
Once the router shows solid connection lights, plug the charging dock back in and place the vacuum on it. Press the dock and clean buttons simultaneously for 10 seconds to boot it up. The Wi-Fi indicator should start blinking blue, signaling it’s ready to pair.
Check Your Wi-Fi Network Settings
Log into the router’s admin panel (usually at 192.168.1.1 or 192.168.0.1, check the label on the router itself). Look for wireless settings or network configuration. Verify the vacuum is connecting to the 2.4 GHz band, not 5 GHz.
If the router uses a single SSID for both bands (common with mesh systems like Eero or Google Wi-Fi), create a separate 2.4 GHz-only network with a unique name. Name it something like “HomeNetwork_2G” to distinguish it. Set the security to WPA2 (not WPA3, many Shark models don’t support the newer protocol).
Check the DHCP settings to ensure the router isn’t maxed out on device assignments. Most home routers default to 50-100 DHCP leases. If every smart bulb, speaker, and thermostat is eating an address, there’s none left for the vacuum. Increase the DHCP pool size or remove unused devices from the network.
Some ISP-provided routers use AP isolation or client isolation modes that prevent devices from talking to each other. This feature blocks smart home devices from communicating with control apps. Find the wireless isolation setting (often under advanced security) and disable it. Research from CNET shows isolation modes are enabled by default on many rental routers from major ISPs.
How to Reset Your Shark Robot Vacuum to Factory Settings
If quick fixes don’t work, a factory reset wipes all settings and forces a clean reconnection. This erases saved maps, cleaning schedules, and room labels, so it’s a last resort. But it also clears corrupted network credentials and firmware conflicts.
Place the vacuum on its charging dock and ensure it has at least 50% battery. Low battery during reset can brick the device (rare, but it happens). Locate the reset button, on most Shark models, it’s a small recessed button near the power switch. Models like the IQ Robot and AI Ultra have it on the side panel: older models may place it underneath near the brushroll.
Use a paperclip or SIM tool to press and hold the reset button for 10 seconds. The vacuum will chirp, and all indicator lights will flash. Release the button. The vacuum will reboot, and the Wi-Fi light should blink blue, indicating it’s in pairing mode.
Open the SharkClean app and tap the plus icon to add a new device. Select the vacuum model from the list. The app will prompt for Wi-Fi credentials, enter the 2.4 GHz network name and password. Make sure the phone running the app is also connected to the 2.4 GHz band during setup (iOS and Android default to 5 GHz if available).
The app will display a progress bar as it pairs. This takes 30-90 seconds. Don’t close the app or let the phone sleep during this process. Once connected, the vacuum will download any available firmware updates automatically. Let it finish before starting a cleaning cycle. Interrupting a firmware update can corrupt the operating system.
After the reset, the vacuum will need to remap the home. Run a full exploratory clean with all doors open so it can rebuild the floor plan. This first post-reset run takes longer than usual, plan for 90-120 minutes depending on square footage.
Troubleshooting the SharkClean App Connection Issues
Sometimes the vacuum connects to Wi-Fi fine, but the SharkClean app won’t communicate with it. This usually points to app permissions, account conflicts, or cloud sync problems rather than local network issues.
Check app permissions in phone settings. The SharkClean app needs location access (to detect local devices), Bluetooth (for initial pairing), and background data (for remote control). On iOS, go to Settings > Privacy & Security > Location Services and ensure SharkClean is set to “While Using the App.” On Android, go to Settings > Apps > SharkClean > Permissions and enable Location, Nearby Devices, and Background Data.
If the vacuum appears offline in the app but the Wi-Fi light on the unit is solid, force close and restart the app. On iOS, swipe up from the bottom and swipe the app off the screen. On Android, go to Recent Apps and swipe it away. Don’t just switch to the home screen, that leaves it running in the background with a stale connection.
Log out and back in to the SharkClean account. This forces a cloud sync and refreshes device registration. Tap the profile icon, select Sign Out, then log back in with the registered email and password. The vacuum should reappear in the device list within 10-15 seconds.
Check for app updates in the App Store (iOS) or Google Play (Android). Shark pushes regular updates to fix bugs and improve device compatibility. According to recommendations from Good Housekeeping, keeping smart home apps updated prevents most connectivity and performance issues. Outdated app versions often lose compatibility with newer vacuum firmware.
If multiple people control the vacuum, make sure only one account is logged in at a time on different devices. The SharkClean app doesn’t support simultaneous logins from multiple accounts, it boots the first session when a second person logs in. Create a shared household account instead of individual ones to avoid conflicts.
Preventing Future Disconnection Problems
Once reconnected, a few proactive steps keep the Shark vacuum online and responsive without constant troubleshooting.
Assign a static IP address to the vacuum in the router’s DHCP settings. Log into the router admin panel, find the connected devices list, locate the vacuum by its MAC address (printed on a sticker under the dustbin or on the dock), and reserve a specific IP for it. This prevents the router from reassigning addresses and dropping the connection during DHCP renewal.
Keep the charging dock within 25 feet of the router with minimal obstructions. Avoid placing it in closets, behind metal furniture, or near large appliances that block signal. If the home has Wi-Fi dead zones, add a mesh extender node near the dock. Standard extenders create a separate network, which complicates pairing, mesh systems keep one SSID across all nodes.
Disable band steering on dual-band routers. This feature automatically pushes devices to 5 GHz for better speed, but Shark vacuums can’t use it. The router keeps trying to “help” by steering the vacuum to the faster band, causing repeated disconnections. Find the band steering or smart connect setting in the router’s wireless configuration and turn it off.
Update firmware regularly through the SharkClean app. Open the app, tap the vacuum’s settings icon, and select “Check for Updates.” Shark releases firmware patches to fix connectivity bugs, improve mapping accuracy, and add features. Run updates when the vacuum is docked with at least 50% charge and won’t be needed for an hour.
Reboot the router monthly as preventive maintenance. Many consumer routers accumulate memory leaks and routing table errors over weeks of continuous operation. A monthly reboot clears these issues before they cause smart device dropouts. Schedule it during a time when no one needs internet access.
If disconnections still happen after all these steps, the vacuum’s Wi-Fi module may have a hardware fault. Shark offers a limited warranty (usually 1-2 years depending on model and purchase date). Contact Shark support with the serial number (on the underside near the brushroll) and a description of troubleshooting steps already tried. They may authorize a replacement or offer a repair depot service.